Since the next picture I want to paint will be a perspective drawing, I decided to practice perspective drawing because, come to think of it, I have never organized it properly.
Review of perspective drawing
This is not a commentary article on perspective or vanishing points, so I will be brief.
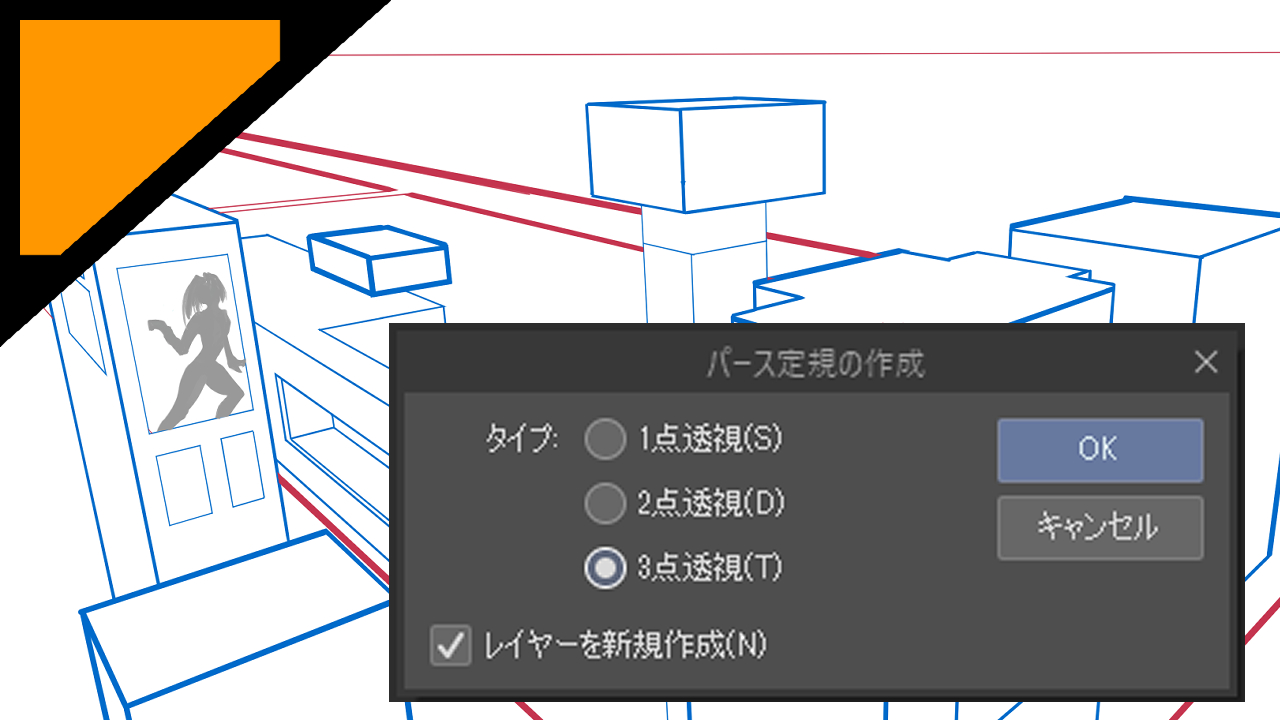
There is one-point perspective and three-point perspective, and this number is the number of vanishing points.
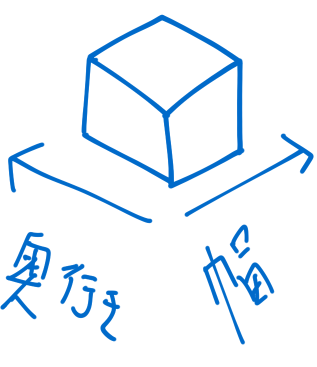
If you ask me what the vanishing point is, I would say that it is the point where the boxes are placed side by side and their sides are extended to intersect.
It seems safe to say that in two dimensions all edges are toward the vanishing point.
One-point and two-point perspective should be used to express depth and width on a plane. Two vanishing points are set on the eye level.
The three-point perspective adds the concept of height to this and seems to be used for illustrations with a stronger sense of perspective.
Maybe in that kind of atmosphere.
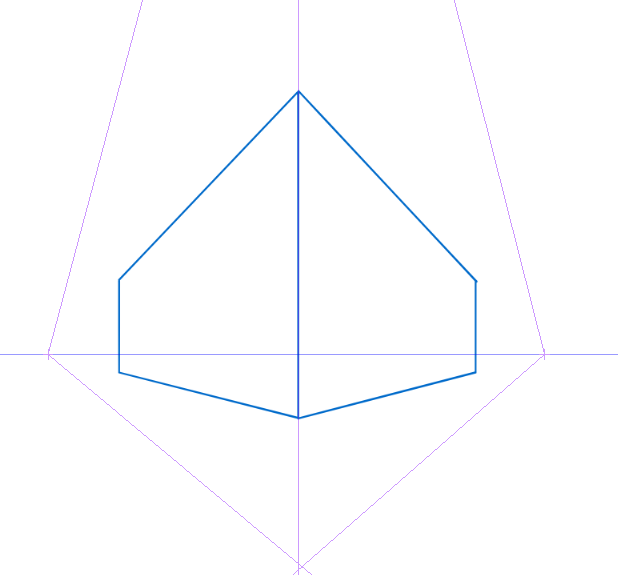
one-point perspective
This is a practiced one-point perspective. Both eye level and vanishing point are in the middle of the image.
I had no idea about the size of the furniture-like guys, so the illustration looks like a lazy diorama, but at first I didn’t really understand one-point perspective, so I didn’t know what it was all about.
The following is a summary of what I found after a lot of research.
The vanishing point in one-point perspective is the vanishing point of depth.
In other words, when expressed as a cube, width and height are not directed to the vanishing point.
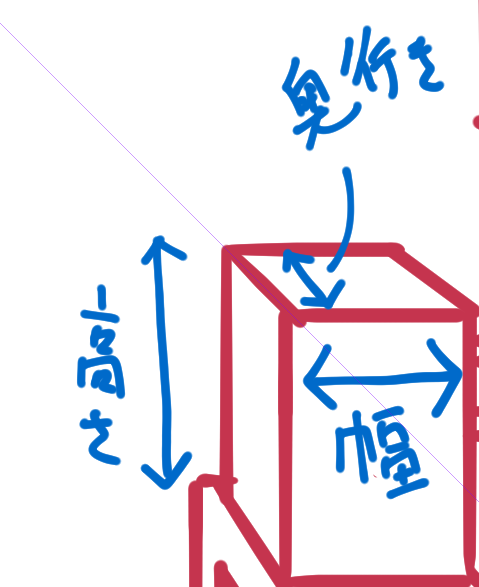
The width is drawn horizontally with respect to the eye level.
The height is drawn perpendicular to eye level.
Depth can be expressed by the amount of displacement from the eye level position to the left, right, up and down.
At first, I had no idea what this horizontal and vertical meant.
In short, it will be a cube viewed from the front.
If this is made into a cube viewed from an angle, the depth and width will point in the direction of the day after tomorrow, which means that one of the diagonal lines will not converge on the vanishing point.
This means that this would be a two-point perspective.
This is the reason why the first one-point perspective was not used at all.
Although one-point perspective may seem difficult to use, it can be expressed in various ways by shifting the height of the eye level and the position of the vanishing point from the center. Perhaps.
I feel that the best places to use it are in rooms, corridors, and other narrow or confined spaces.
Since this was my first practice, I drew it with the vanishing point in the middle.
two-point perspective
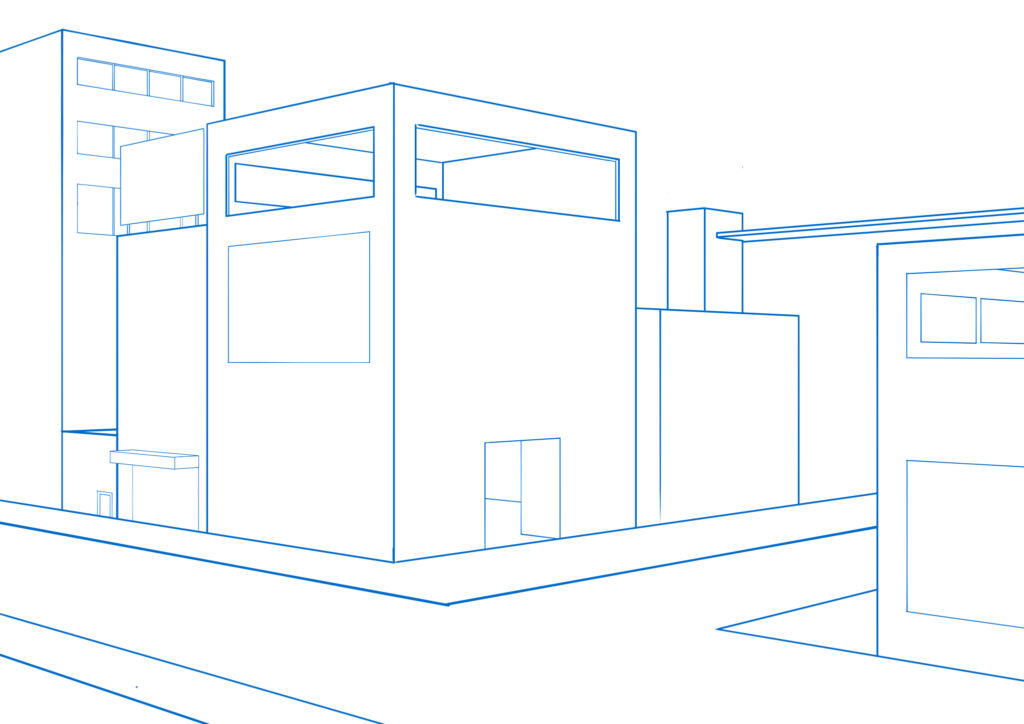
This should be the naname-like box representation that was mistakenly used in the one-point perspective.
The eye level is set in the middle of the canvas, and both vanishing points are set outside the canvas.
I saw in some article or video that the vanishing point distance should be wider outside of the canvas to make it look somewhat natural.
The closer the vanishing point, the tighter the perspective.
It will be less confusing if you remember that if you draw a horizontal line above the eye level position, the line should be downward toward the vanishing point, and if you draw a horizontal line below the eye level, the line should be upward toward the vanishing point.
Will it decrease?
With two vanishing points, width can now be expressed in addition to depth.
As for the expression of height, since there is no vanishing point, a line perpendicular to the eye level is drawn as in the one-point perspective method.
It tends to be used when drawing townscapes, buildings, etc., as in the picture you practiced.
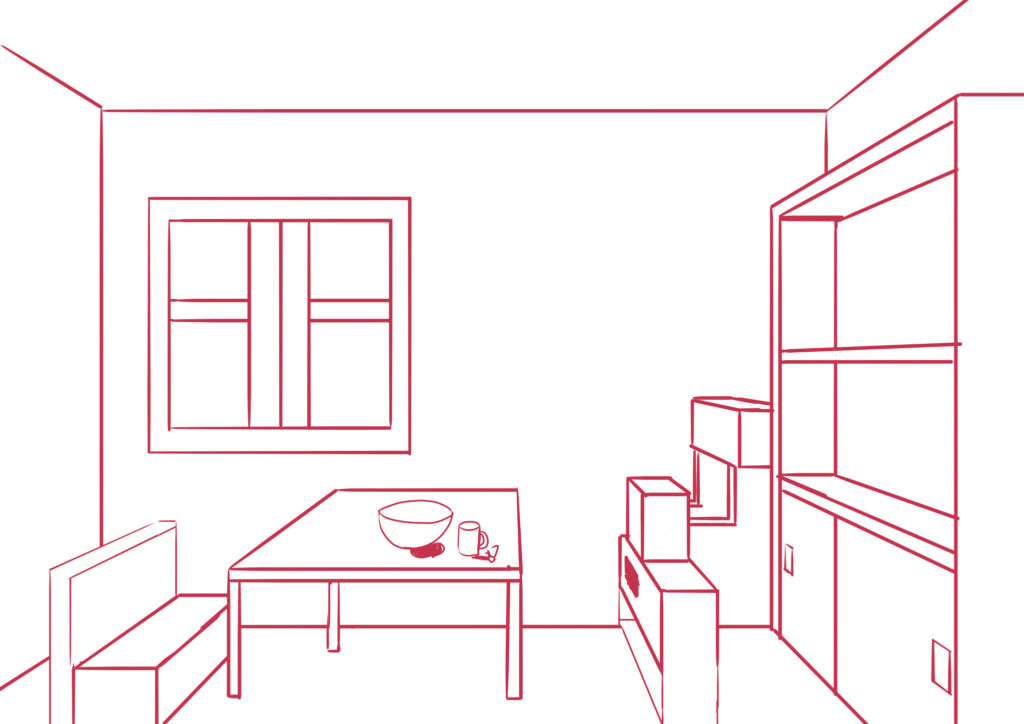
three-point perspective
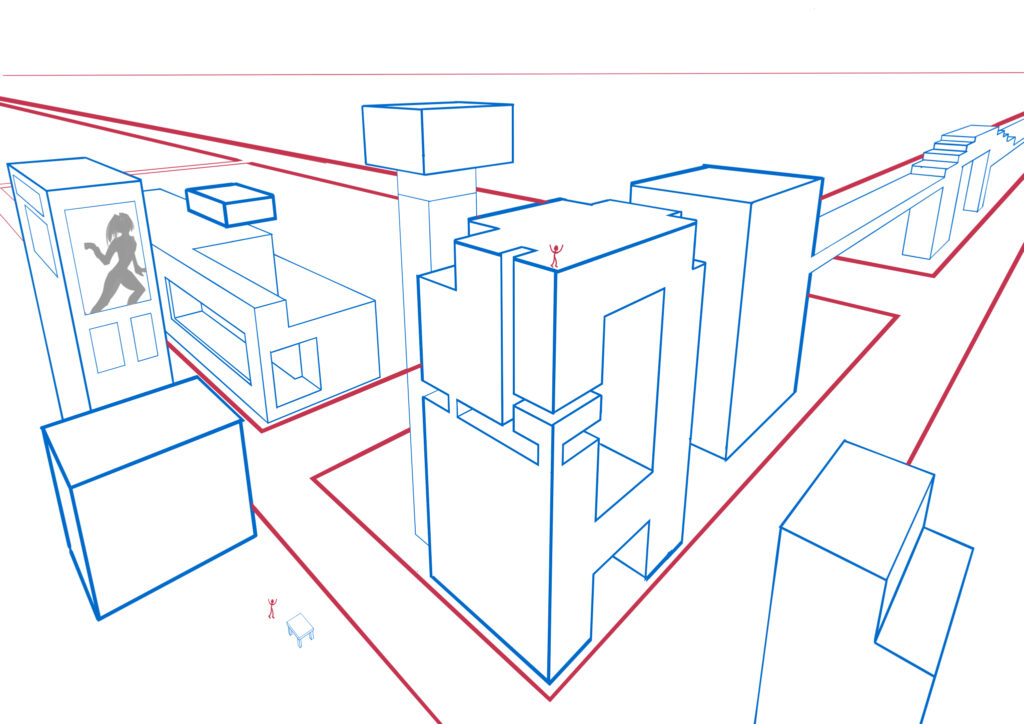
Perspective representation by adding a vertical vanishing point to the two-point perspective.
Remember, the further away from eye level, the smaller the object.
In this exercise, the red line at the top of the canvas is set as the eye level.
Two red people are placed, one on top of the building and the other on the ground in the lower left corner, and the person on the ground should be drawn smaller to make it look more natural.
I regretted that I had said so boldly that I thought it would have been more natural to draw the people on the ground smaller.
Since the third vanishing point was set quite far away, the perspective is thin, and I feel that it is difficult to understand.
Next time I will practice with a more extreme perspective.
Positives that could be taken away from this practice
I think it was personally significant that I was able to understand one-point perspective.
I knew the terms “perspective” and “vanishing point,” but I had not studied each of them in an organized manner, so I had an unnatural understanding of some parts.
Now that this area has been sorted out, I felt that there are more areas that can be utilized.
However, this exercise was just a touch of perspective drawing, so I think it is a technique that still needs to be developed in the future.
Next, I would like to draw the same subject matter differently in each perspective.
Also, I was mainly (or almost entirely) drawing box-shaped pictures to make it easier for myself to understand, but I eventually saw the challenge of trying to represent non-square objects in each perspective, as I wanted to utilize this when drawing the characters.
I am concerned that I don’t have a clear idea of how to apply this to a character at this point in time, but I still want to do my best so that every time I practice something, I can find the next challenge and move on.


Comment